안녕하세요.
회사에서 간단한 사이드 프로젝트를 진행하다, 회원가입과 어드민 유저의 회원 초대 및 관리 기능이 필요하다는 사실을 알게 되었습니다. 분명 간단한 거랬는데... :(
사실 로그인/로그아웃/회원가입 기능은 간단하면서도 은근 손이 많이가는 그런 기능인데요, 이부분을 간편하게 처리할 수 있는 방법이 없을까 고민하다가 Auth0를 이용하기로 했습니다.
Auth0: Secure access for everyone. But not just anyone.
Rapidly integrate authentication and authorization for web, mobile, and legacy applications so you can focus on your core business.
auth0.com
이용방법은 아주 간단합니다.
1.Auth0Provider 삽입
우선은 Auth0에서 아이디를 생성하고 어플을 만들고난 후 리엑트 기준으로 아래 코드를 넣어주기만 하면 됩니다.
//index.tsx

import { Auth0Provider } from "@auth0/auth0-react";

const root = ReactDOM.createRoot(
  document.getElementById('root') as HTMLElement
);

root.render(
  <React.StrictMode>
    <Provider store={store}>
      <Auth0Provider
        domain="어플리케이션 도메인"
        clientId="어플리케이션 클라이언트 아이디"
        authorizationParams={{
          redirect_uri: window.location.origin
        }}
      >
        <RouterProvider router={router} />
      </Auth0Provider>
    </Provider>
  </React.StrictMode>
);
2. 로그인 버튼 삽입
친절하게도 Auth0에서는 로그인 버튼 코드까지 만들어 제공합니다.
import { useAuth0 } from "@auth0/auth0-react";

const LoginButton = () => {
  const { loginWithRedirect } = useAuth0();

  return <button onClick={() => loginWithRedirect()}>Log In</button>;
};

export default LoginButton;
하지만 만약 localhost에서 로그인 버튼을 누르면 아래와 같은 에러가 발생할 겁니다.
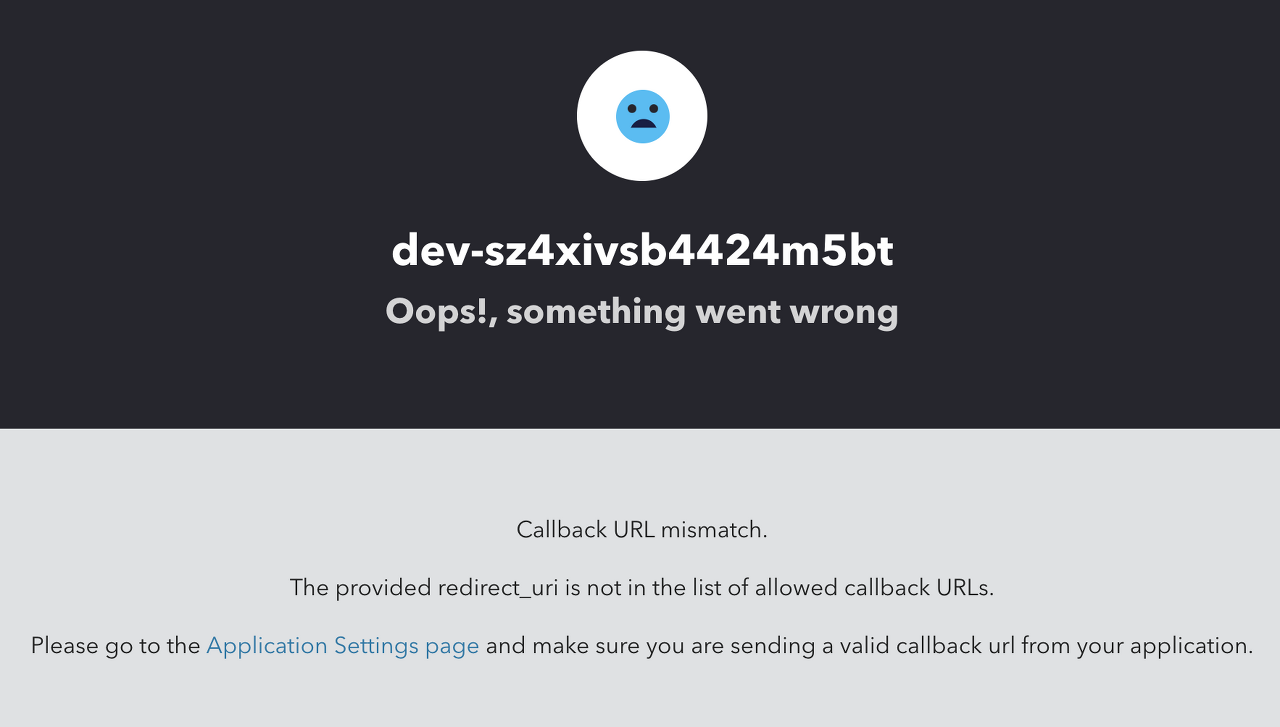
따라서 아래와 같이 설정을 해주셔야 합니다.
3. Auth0 설정
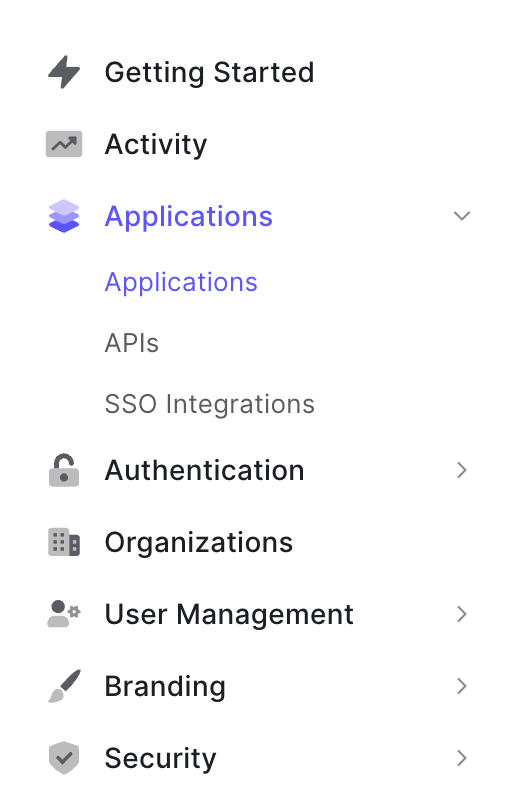
Auth0 대시보드로 이동하신뒤 메뉴에서 Applications에 들어갑니다.
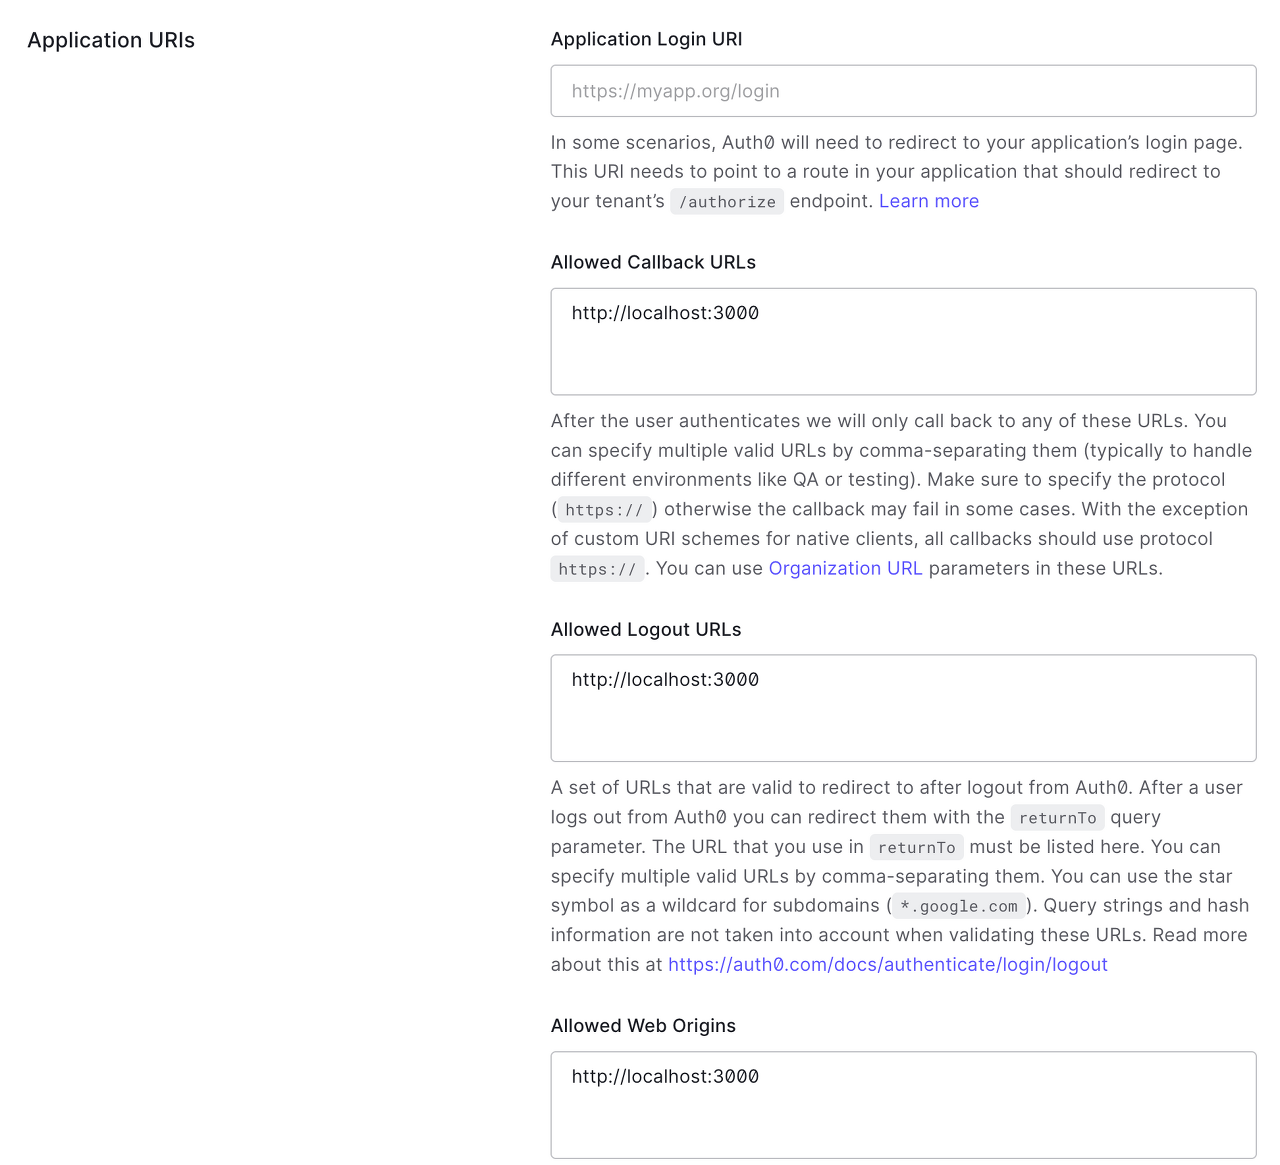
그리고 아래와 같이 url설정에 localhost 주소를 넣어줍니다.
'Front-End > React' 카테고리의 다른 글
| [React] React Fiber Reconciler (0) | 2023.06.16 |
|---|---|
| [React] lambda-client request 취소하기 (0) | 2023.05.15 |
| [React] Refactoring (0) | 2023.05.03 |
| [React] 플랫폼 메인구조(헤더, 사이드바, 푸터) 특정 페이지에만 적용하기 (0) | 2023.03.02 |
| [React] React를 왜 만들었을까? (0) | 2023.02.17 |


